
INDEX
-
Part A: One-time computer setup
-
Part B: Set up DoQuotes Modules
-
Part C: Using DoQuotes Modules
Appendix: How to delete DoQuotes Modules
About DoQuotes Modules
This guide covers DoQuotes Modules — the custom, buyer-facing quote modules that add to a HubSpot Revenue Hub quote template: form fields (text, number, date, dropdown, radio, checkbox) that save a buyer's answer back to a HubSpot property, plus a flexible column layout module. It walks through installing DoQuotes Modules into a brand-new HubSpot portal for the first time, from your computer's prerequisites through adding your first module to a quote.
Note: This guide is specifically for Revenue Hub quote modules. If you're looking to install the main DoQuotes app and its CRM app cards, see the Set-Up Guide: How to install DoQuotes instead.
Note: DoQuotes requires a HubSpot Revenue Hub Professional or Enterprise portal — quote modules aren't available on other plans.
This guide has three parts. Part A (step 1) sets up your computer once — you won't need to repeat it for future portals. Part B (steps 2-3) sets up DoQuotes Modules once per portal. Part C (step 4) is what you'll come back to any time you want to use a module — it's not a one-time setup step like Parts A and B.
Part A: One-time computer setup
1. Install Node.js and the HubSpot CLI (on your Mac or PC)
What is Node.js? Node.js is a free, widely-used developer tool for running small install scripts on your computer — it's not part of HubSpot, but HubSpot's own developer tools (including the HubSpot CLI just below) need it installed to work, and DoQuotes is no different. You don't need to understand how it works, just that it's a one-time, one-per-computer step covered below.
DoQuotes modules are installed using two small developer tools: Node.js (runs the install scripts) and the HubSpot CLI — CLI stands for Command Line Interface, HubSpot's own tool for uploading your quote project to HubSpot. Both are installed once per computer, not once per portal.
Before you start: Node.js and the HubSpot CLI are free, open-source developer tools used by thousands of other software projects — not something HubDo built or controls. They're safe to install, but installing any new software on your computer is done at your own risk: HubDo can't take responsibility for anything these tools do to your computer, separate from DoQuotes itself. If your computer is managed by your employer's IT department, you may need their approval before installing new software — check with them first if you're unsure.
-
Open the Terminal app on your Mac, or Command Prompt on Windows:
-
Press Cmd + Space to open Spotlight, then type
Terminal. Once it appears in the results, press Return, or double-click it, to open it.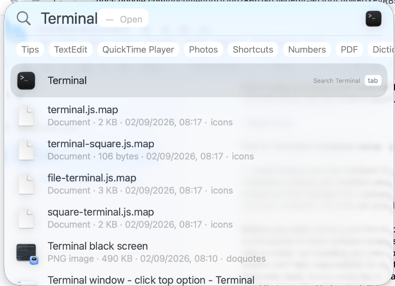
-
You'll see a plain window with a line ending in a
$, waiting for you to type — that's the prompt. Everything below gets typed after it, followed by Return.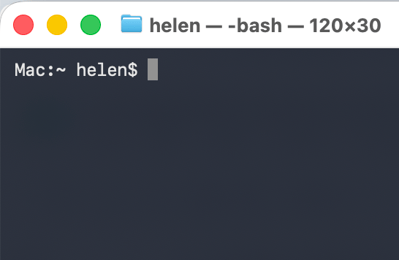
-
-
Check whether Node.js is already installed. Type
node -vand press Enter.That's a hyphen, then a lowercase v — not the number 1. It's an easy mistake to make; if Terminal says it can't find what you typed, just try again.
If you see a version number of v20 or newer (e.g.
v22.23.2), you're set — skip straight to installing the HubSpot CLI below. If you see "command not found," or a version below 20, install it:- Go to nodejs.org and click the green Get Node.js button.
-
The page that opens defaults to showing a command-line install method first (a block of text starting with
curl) — you can skip past that. Scroll down to the direct-download section and click the green button labelled macOS Installer (.pkg) (or Windows Installer (.msi) on Windows).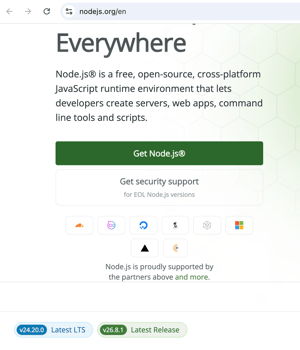
-
Run the downloaded installer, accepting all of its default options. Partway through, macOS will ask for your fingerprint or password to allow the install — this is normal for any installer, not a sign of a problem.
- Come back to Terminal and repeat this check (
node -v) to confirm it worked.
-
Install the HubSpot CLI. Type:
sudo npm install -g @hubspot/cliYou'll be asked for your Mac password again, the same as during the Node.js install above. This adds a new command,
hs, that you'll use throughout the rest of this guide.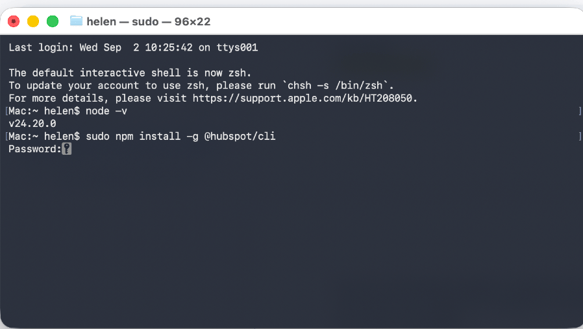
Note: This step may also bring up a system dialog saying "python3" command requires the command line developer tools. If you see it, click Install and then just carry on — it downloads in the background on its own, so there's no need to wait for it to finish before moving on to the next step.
Tip: If Terminal ever says command not found: hs, the HubSpot CLI either didn't finish installing or isn't available in this Terminal window yet:
- Scroll up in Terminal and check the HubSpot CLI install command above actually completed without a red error message. If it didn't, re-run
sudo npm install -g @hubspot/cli. -
If it did complete, close this Terminal window and open a brand-new one (Cmd + Space, type
Terminal, as in step 1), then try again — a window that was already open before the install finished won't pick up the change.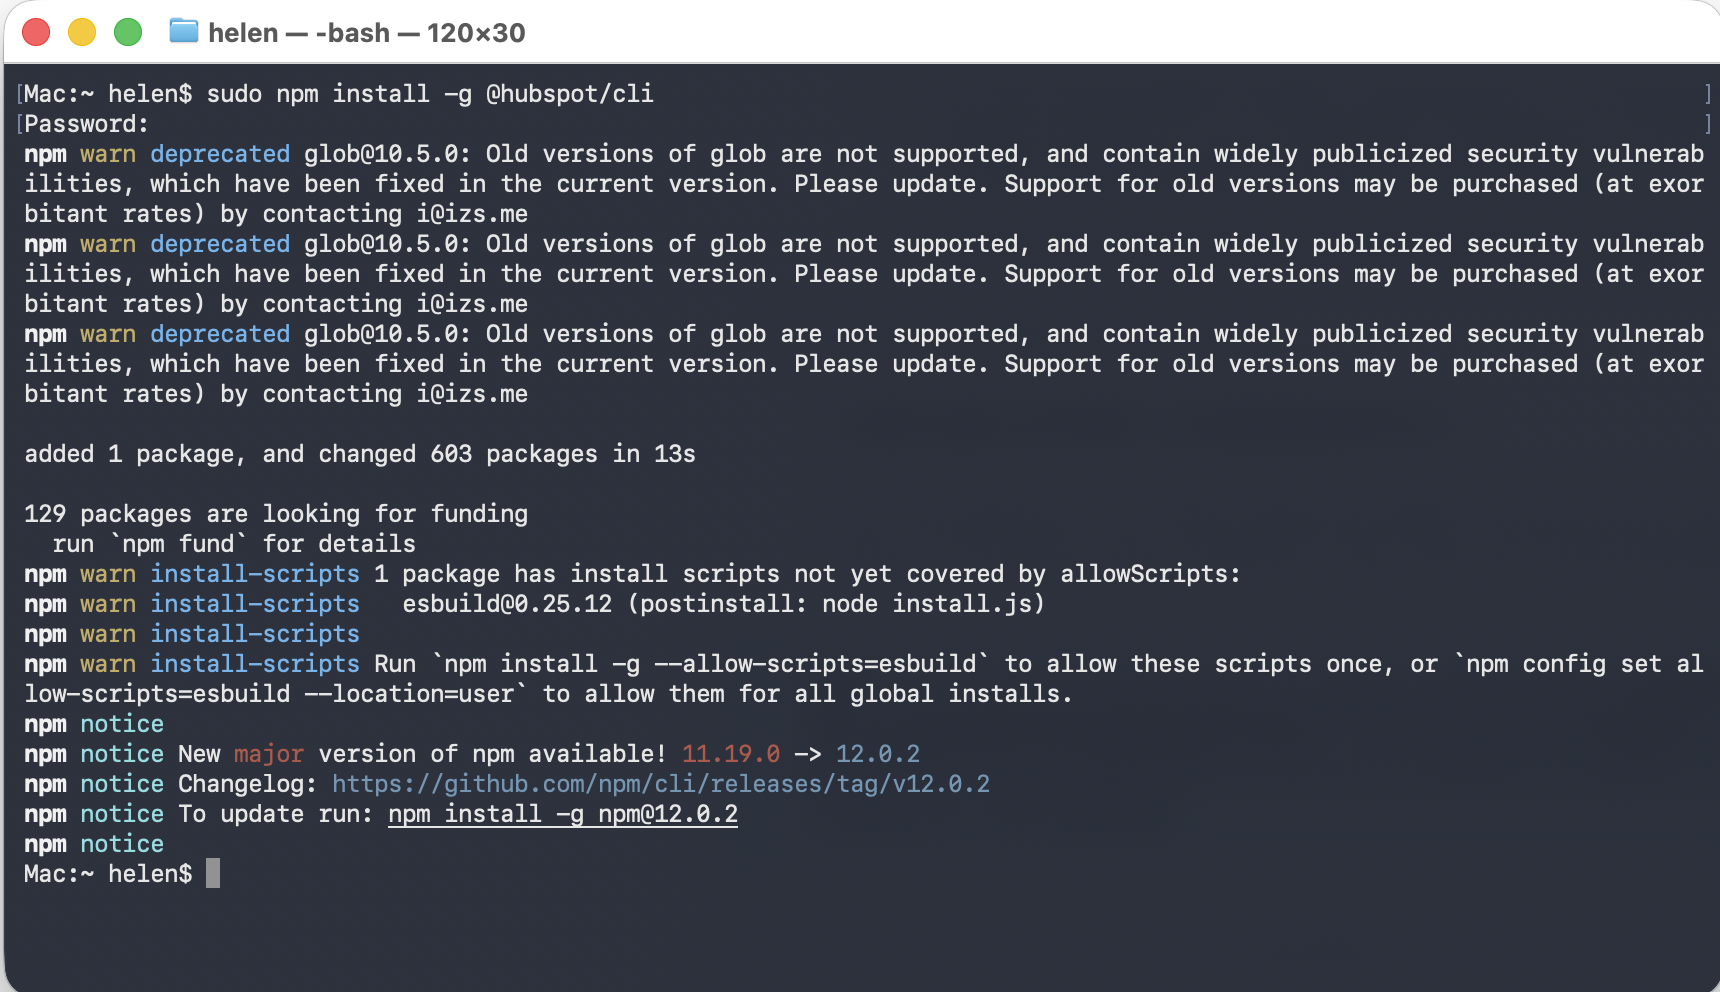
-
Still stuck? Contact support@hubdo.com with a screenshot of what you see, rather than spending time troubleshooting it yourself.
Tip: You only need to do this step once per computer. If you're setting up a second portal later on the same Mac, you can skip straight to Part B (step 2) below.
Part B: Set up DoQuotes Modules
2. Create your HubSpot quote project and add DoQuotes' modules
You'll do this once per HubSpot portal you set up DoQuotes on. One command now creates the project, adds DoQuotes' modules, and installs everything it needs — you'll end this step ready to deploy.
What's a "project" here? Just a folder on your computer — the command below creates one (named doquotes) and fills it with the files HubSpot needs to build and upload your modules. It's a technical term borrowed from HubSpot's own developer tools, not a "project" in the everyday work-task sense.
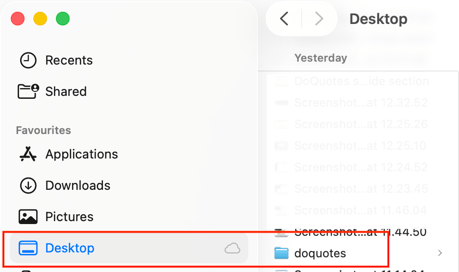
Tip (skip this if it's your first time): only relevant if you've already been through this exact guide once before for this HubSpot portal, and still have the project folder it created on your computer from back then. If that's you, open Terminal inside that existing folder and run npx @hubdo/doquotes there instead — it adds any new DoQuotes modules to what you already have, rather than starting over. If this is your first time setting up this portal, ignore this tip and just carry on with the instructions below.
Tip — updating later: if HubDo releases a newer version of DoQuotes and you want to update your existing modules, re-run this command with --force: npx @hubdo/doquotes --force. Without --force, it skips any module it finds already installed rather than overwriting it — so if you'd made your own edits to a module, they're safe by default.
-
In Terminal, go to the folder on your computer where you'd like the
doquotesproject folder to be created — for example your Desktop:cd ~/Desktop -
Type
npx @hubdo/doquotesand press Enter. This downloads DoQuotes' setup script and runs it, which creates a newdoquotesproject folder inside the folder you just navigated to, and fills it with the files HubSpot needs to build and upload your modules.
What is npm? npm is Node.js's own package manager — the tool Node.js uses to download and run small pieces of software, like the command above. It was already installed alongside Node.js in step 1; you don't need to do anything with it directly, it's just a name you'll see mentioned in some of the messages below.
Note: On a Mac, this may bring up a system dialog saying "python3" command requires the command line developer tools — this is a normal, one-time Apple prompt, not a DoQuotes or HubSpot error; some of the install's underlying dependencies need it, and you may already have seen it in Part A, step 1, above. Click Install if you see it, then just carry on — it downloads in the background on its own and won't stop this step from finishing, so there's no need to wait for it.
- The first time you run this, npm hasn't downloaded DoQuotes yet, so it will ask something like:
Type y and press Enter (or just press Enter on its own — this prompt defaults to y either way).Need to install the following packages: @hubdo/doquotes@1.1.0 Ok to proceed? (y)
Note: The version number shown will be whatever the current release is at the time — it won't always say 1.1.0.
-
It then confirms where it's about to create the project folder, and asks before doing anything:
Type y and press Enter — this prompt defaults to No, so you must type y yourself for it to proceed.This will create a new HubSpot quote project at: /Users/yourname/Desktop/doquotes Create it? (y/N) -
You'll then see the project folder created, followed by a confirmation listing everything DoQuotes added to it — a set of shared files followed by one entry per module:
That's seven Field modules and one Layout module — this matches everything DoQuotes currently ships, so this list is the same every time you run this command fresh. (The exact file counts may differ slightly from what you see, as DoQuotes adds new files over time.)✔ Created the project (11 files). ✔ Installed: - shared/ConditionalVisibility.tsx - shared/CrmPropertyTargetFields.tsx ... (26 shared files in total) - modules/FieldDatePicker - modules/FieldDropdownSelect - modules/FieldMultiLineText - modules/FieldNumber - modules/FieldRadioSelect - modules/FieldSingleCheckbox - modules/FieldSingleLineText - modules/LayoutColumns -
It then installs everything the project needs, which takes a minute or two and prints a lot of text. You don't need to read or act on any of it — just wait for the
✔ Ready.message below.
Note: Partway through, npm may suggest running npm audit fix — don't run it, or npm approve-scripts if that's suggested either. This tooling is maintained by HubSpot, and changing its dependency versions yourself can break things in ways that are hard to undo. If you're ever concerned about one of these warnings, contact support@hubdo.com rather than trying to fix it yourself.
You'll see a lot of text scroll by here — none of it needs your attention. Warnings about deprecated packages, the install appearing to run twice, and a summary mentioning a number of "vulnerabilities" are all normal and expected. Don't try to fix or investigate any of it (and don't run npm audit fix, per the note above) — just wait for the ✔ Ready. message below.
- You'll know it worked when you see:
✔ Ready.
Move into your new project folder:
cd doquotes
Then continue to the next step below to deploy it — don't run hs project upload yet. You need to make sure you're authenticated to the correct HubSpot portal first, which the next step covers.
3. Deploy the DoQuotes project to your HubSpot portal
You should still be in your new doquotes project folder from the end of step 2 — if you're not sure, or opened a new Terminal window, run cd doquotes again first (from wherever you created it on your computer). Before running hs project upload, first make sure you're authenticated to the correct HubSpot portal and that it's set as your default — here's how:
- In Terminal, type
hs account useand press Enter. This lists every HubSpot portal you've already connected the CLI to — if more than one is listed, use the up and down arrow keys to highlight the correct one for this project, then press Enter to select it. -
If your portal isn't listed at all, you haven't connected the CLI to it yet. Type
hs account authand press Enter, then use the arrow keys to choose Authenticate a new account from the list and press Enter — then follow these sub-steps:-
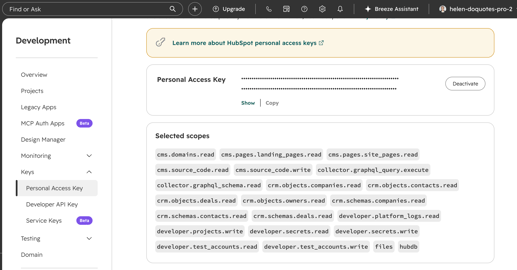
Your browser opens automatically to a HubSpot page for generating a CLI Personal Access Key — nothing else to type in Terminal yet.
-
In the browser: choose which HubSpot portal to connect, and confirm the permission scopes shown. Leave all scopes selected — these control what the CLI itself can do (like
hs project upload), not DoQuotes' own permissions, and deselecting one can cause project uploads to fail later for no obvious reason. -
Once confirmed, the key is sent straight back to the CLI automatically — there's nothing to copy or paste. Terminal shows
✔ Personal access key received.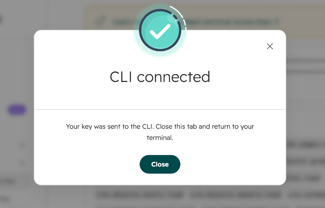
-
Terminal then suggests a name for this connection, based on your own portal's name — for example,
✔ Enter a unique name to reference this account in the CLI: acme-incif your portal is called "Acme Inc." (yours will be based on your own portal's name, not this example). Press Enter to accept the suggested name, or type your own (no spaces). - Terminal then asks you to confirm that name as your default account, e.g.
? Set acme-inc as your default account? [--default] (y/N). Type y and press Enter — this prompt defaults to No, so you must type y yourself for it to proceed. Setting it as default means the commands below will automatically target this portal without you needing to specify it each time. - Once you're authenticated, type:
hs project upload -
-
You'll likely see two warnings before anything else happens:
Both are safe to ignore — the same underlying "vulnerabilities" you saw during step 2, and an optional linting step you don't need for this setup.⚠ WARNING Project lint: lint packages not installed for src/cms-assets/my-react-assets. Run `hs project lint` to install them. ⚠ WARNING npm audit: security issues found for src/cms-assets/my-react-assets: 20 total (4 high, 14 moderate, 2 low) - Since this project doesn't exist in your portal yet, you'll be asked:
Type Y and press Enter (or just press Enter on its own — this prompt defaults to Yes since the Y is capitalized). (The account name and number shown here are your own —? [--forceCreate] The project doquotes does not exist in acme-inc [test account] (123456789). Would you like to create it? (Y/n)acme-incand123456789above are just an example, taken from one of HubDo's own test portals, not values to expect literally.) - HubSpot then creates the project, uploads your files, and automatically builds and deploys it, all in one go, with no further prompts:
✔ SUCCESS New project doquotes successfully created in acme-inc [test account] (123456789). ✔ Uploaded doquotes project files to acme-inc [test account] (123456789) View build #1 in HubSpot: https://app.hubspot.com/developer-projects/123456789/project/doquotes/activity/build/1 ✔ Built doquotes #1 -------------------------------------------------- Build #1 succeeded. Automatically deploying to acme-inc [test account] (123456789) View deploy of build #1 in HubSpot: https://app.hubspot.com/developer-projects/123456789/project/doquotes/activity/deploy/1 ✔ Deployed build #1 in doquotes - Once you see "Deployed build #1 in doquotes," your DoQuotes modules are live in the portal and ready to add to a quote. You're finished with Terminal at this point — it's safe to close the window.
Note: The project is named doquotes automatically — step 2 created it that way. If you ever set up a second DoQuotes project in the same portal, you'll need to give it a different name first — HubSpot won't let two projects in one portal share a name. You can also view the uploaded project any time by going to your portal and navigating to Developer Projects, or by running hs project open from this same folder.
Tip — cleaning up: You can also delete the doquotes folder this guide had you create back in step 2, if you'd like to tidy up — for example, go to your Desktop, find the doquotes folder, and move it to the Trash. HubSpot already has everything it needs; the folder was only used to build and upload your modules from your computer. The one reason to keep it: if you want to update your modules later using the --force command mentioned in step 2's tips, you'll need this same folder to run it from — so if you're not sure, it doesn't hurt to just leave it where it is.
Part C: Using DoQuotes Modules
Parts A and B above are one-time setup. Everything below is what you'll come back to whenever you want to add a module to a new template, or to a single quote — as often as you like, on any portal Part B has already been run on.
4. Add a DoQuotes module to a quote template or draft quote
Decide first whether you want the module on a template (every future quote made from it will include it) or on a single draft quote (a one-off change, without touching the shared template).
To add it to a template:
- In your portal, go to Settings → Objects → Quotes → Quote Templates → Open template library.
- Create a new quote template, or open an existing one to edit it — if it's already published, unpublish it first so you can make changes.
- Decide where in the template you'd like to add a module.
-
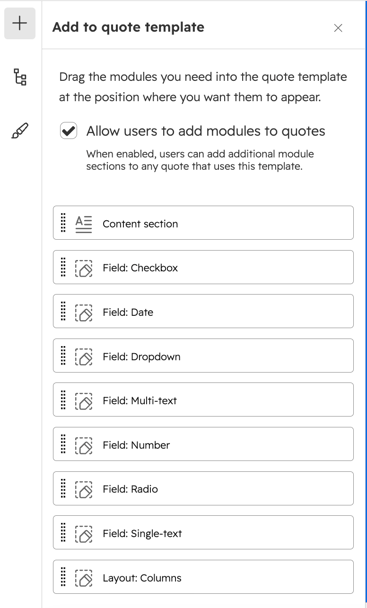
Use the + (plus) icon at the top-left of the editor to add a module to the template.
-
Choose one of DoQuotes' modules in the picker — e.g. Field: Single-text or Layout: Columns — and drag and drop it onto the template.
- Configure the module using the panel on the left side of the editor.
- When you're done, publish the template to make it available for new quotes.
To add it to a single draft quote instead:
- Open the quote — it needs to still be in Draft status — in the quote editor.
- The same + (plus) icon and module picker work directly inside an individual quote, the same way as on a template.
- Configure the module using the panel on the left side of the editor.
- Publish the quote when you're done, to make it available to the buyer.
Note: Field modules (everything except Layout: Columns) need the DoQuotes app installed on this portal, with an active free trial or subscription, before they can save a buyer's answer. Modules communicate with the DoQuotes app to securely save data to the quote and to its associated deal, company and billing company — see Set-Up Guide: How to install DoQuotes if you haven't installed it yet.
What's next
If you haven't already, install the main DoQuotes app and make sure it has an active free trial or subscription — that's the only back-end step Field modules need in order to save a buyer's answer. See Set-Up Guide: How to install DoQuotes.
Any problems at all, contact support@hubdo.com.
Appendix: How to delete DoQuotes Modules
- Go to Developer Projects in your portal, open the doquotes project (or whatever you named it — see step 2), go to its Settings tab, then click Delete Project.
- This removes all DoQuotes modules from the "add to quote template" drag-and-drop panel in the template and quote editor. HubSpot also removes DoQuotes modules already placed on templates and on draft quotes.
- Published quotes keep working exactly as before — the one exception is if a published quote is later recalled back to draft mode for editing: since the modules project no longer exists at that point, its DoQuotes modules are no longer available in that draft.
- No data is lost that was already captured via a DoQuotes module on a published quote. All module data is saved to ordinary HubSpot properties on the quote, the deal, and the buyer and billing companies — deleting the project doesn't touch any of it.
Note: These properties are created by the main DoQuotes app when it's installed, not by this Modules project — deleting the Modules project alone doesn't remove or affect them. See Appendix: How to uninstall DoQuotes in the Set-Up Guide: How to install DoQuotes for the full list of properties DoQuotes creates and what to do with them.